I start sketching ideas for the coming season’s holiday card in late fall. Typically I mock up the best ones and from these finalize the design.
This year, the idea came to me quickly. My friend and I participated in a two-day class at Big Bang Mosiacs in Charlemont, VT earlier this year. Since then I’ve had mosaics on the brain and knew this would be the direction to head.
When making paper greeting cards, I primarily use rubber cement as the adhesive. One reason is that rubber cement doesn’t set immediately. This allows me to finely reposition each piece of paper after its initial placement. Also, I have a bad habit of applying too much rubber cement to the bottom of an individual piece of paper. When this happens, the rubber cement can ooze out from the edges. Rubber cement dries clear, so it isn’t as visible as some other products might be. In many cases, it doesn’t need cleaning up. But when it does, the dried rubber cement can often be removed by rubbing or peeling. (This depends entirely on the type of paper being used for the project.)
Typically the cards I make are 4.25″ x 5.5″.
- Start with standard letter-size card stock, 8.5″x11″
- Cut in half lengthwise to 4.25″x11″
- Fold to 4.25″ x 5.5″
This size card fits a standard size invitation envelope. While I love the look of a square card, they can cost 60% more to post.
The First Design
Knowing I wanted to create a poinsettia design, I first created the basic outline.
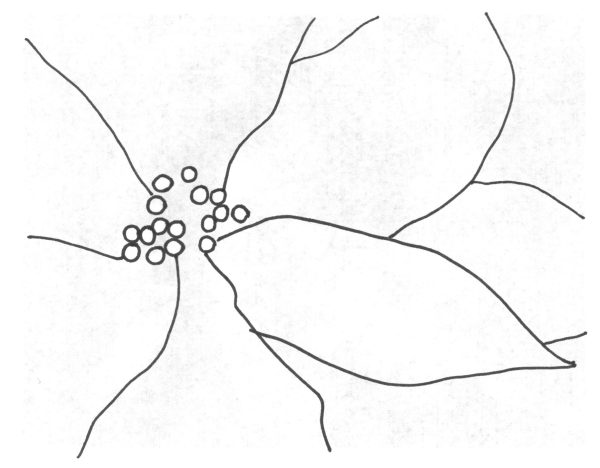
For the first design I used scissors to cut randomly-sized pointed oval shapes. Then, using a light table, I carefully placed each piece to fit inside the framework I’d built.
The pieces were easy to cut but getting them then to fit in the poinsettia-shape template took too long. While I loved the randomness of the sizes and the slightly off-kilter pattern that they produced, it simply took too long. I wanted to reproduce this design dozens of times, so I needed to refine the idea.
The Second Design
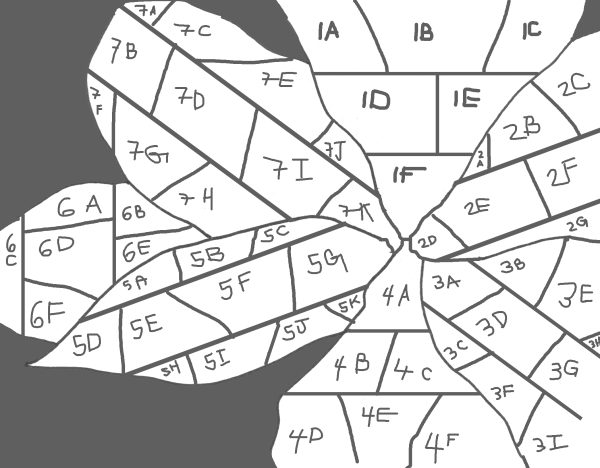
To make the reproduction process easier, I created a master template, drew the poinsettia border and then individual tile borders. Then I scanned in the complete template and printed it four up on the back of the paper I’d be using for the poinsettia part of the design.
First, I cut each sheet in quarters with a freestanding paper cutter, then, with my X-Acto knife, separated the individual pieces. I wanted the final image to fit perfectly on the cover so, rather than making one cut along each line and then spacing out the pieces, I cut each line twice, once on the right and once on the left side of the lines I’d drawn.
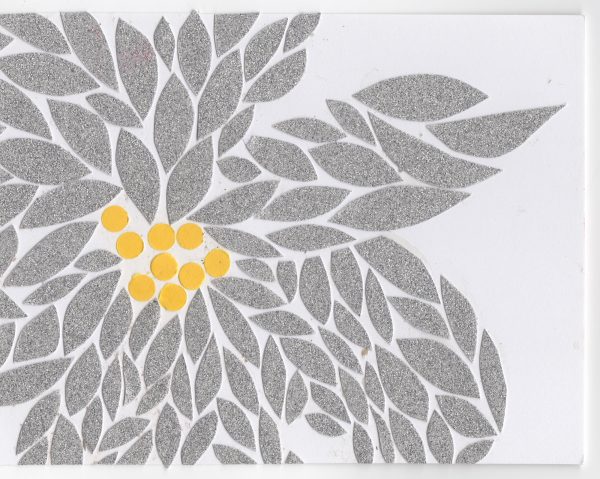
Using scraps of paper leftover from old projects, below is the result.
This was an improvement, but it was too many pieces to be practical.
THE THIRD DESIGN
Using a similar template system, I simply reduced the number of pieces. It was at this time that I realized that rubber cement wasn’t going to work.
I tried a number of different adhesives. In the end Scotch Clear Glue with a Two-Way Applicator was the winner.
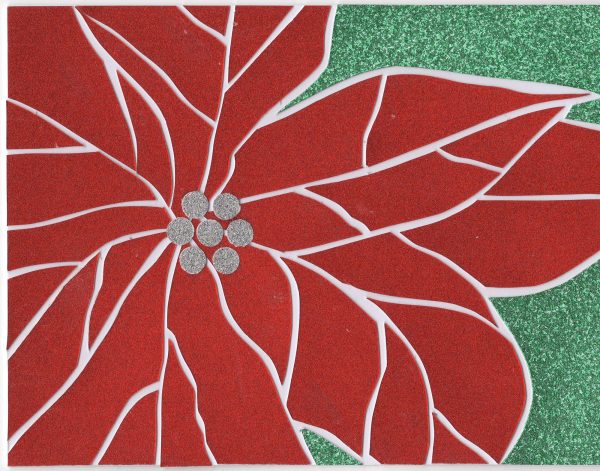
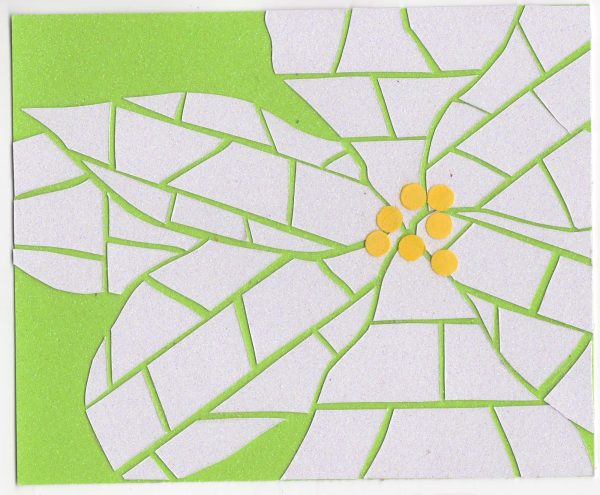
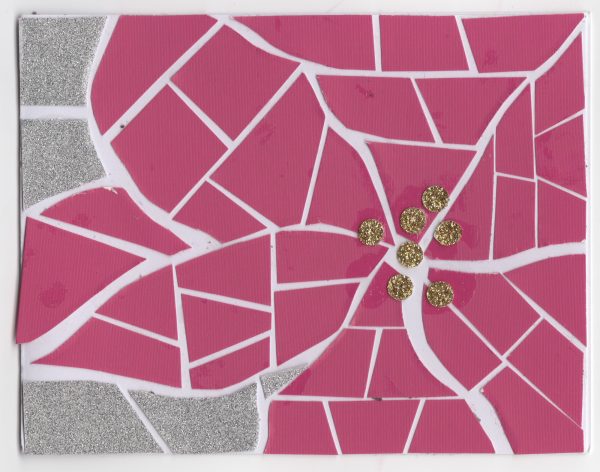
The FOURTH Design
I was really surprised that more pieces didn’t make the design better, so I made each piece even larger. Also, I didn’t like the straight lines and edges so I decided to go with a more freeform cut. This one fit together nicely and was much more fun to reproduce.
Now it was time to choose the perfect paper. I had a few scraps of gold and silver glitter paper to use as the poinsettia flower, and I purchased Thick Blank Glitter Cardstock in Christmas red and green from Amazon. It went through my printer with little issue.
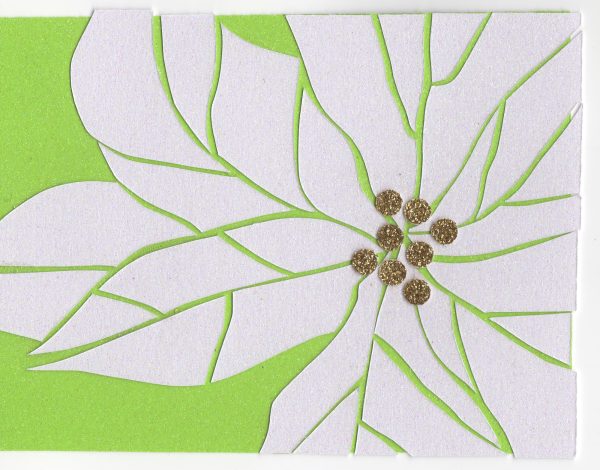
THE FIFTH AND FINAL DESIGN
To make things more fun for me, I sometimes flipped the design or switched out the paper. But most of the final cards looked like below.